Nitro App Hooks in NuxtJS: A Complete Guide
If you’ve been building applications with NuxtJS 3, you’ve likely heard the name Nitro thrown around — but understanding what it actually does under the hood, and more importantly, how to leverage its powerful hooks system, can genuinely transform the way you architect your server-side logic. Nitro is the high-performance server engine that powers NuxtJS 3, handling everything from request processing and static asset generation to multi-platform deployment. And at the heart of its extensibility model lies a clean, type-safe system of hooks that gives developers precise control over the entire server lifecycle without ever touching core framework code. In this guide, we’ll go deep into Nitro App Hooks — what they are, how they work, and how to use them effectively in real-world NuxtJS 3 applications.
What Are Nitro App Hooks?
Nitro is an open-source server toolkit built by the UnJS team. It serves as the universal server engine for NuxtJS 3, abstracting away deployment complexity and providing a consistent runtime across more than 20 deployment targets — from Node.js and Vercel to Cloudflare Workers and AWS Lambda. When you run nuxt build, Nitro is what compiles your server-side code into an optimized, portable output ready for any of these environments.
Within this engine, hooks are predefined interception points in the application lifecycle. Think of them as event listeners attached to specific moments in the server’s existence — when a request arrives, before a response is sent, when an error is thrown, or when the server shuts down. Nitro’s hooks system is powered internally by hookable, another UnJS library, which provides a lightweight yet powerful pub/sub mechanism for lifecycle events.
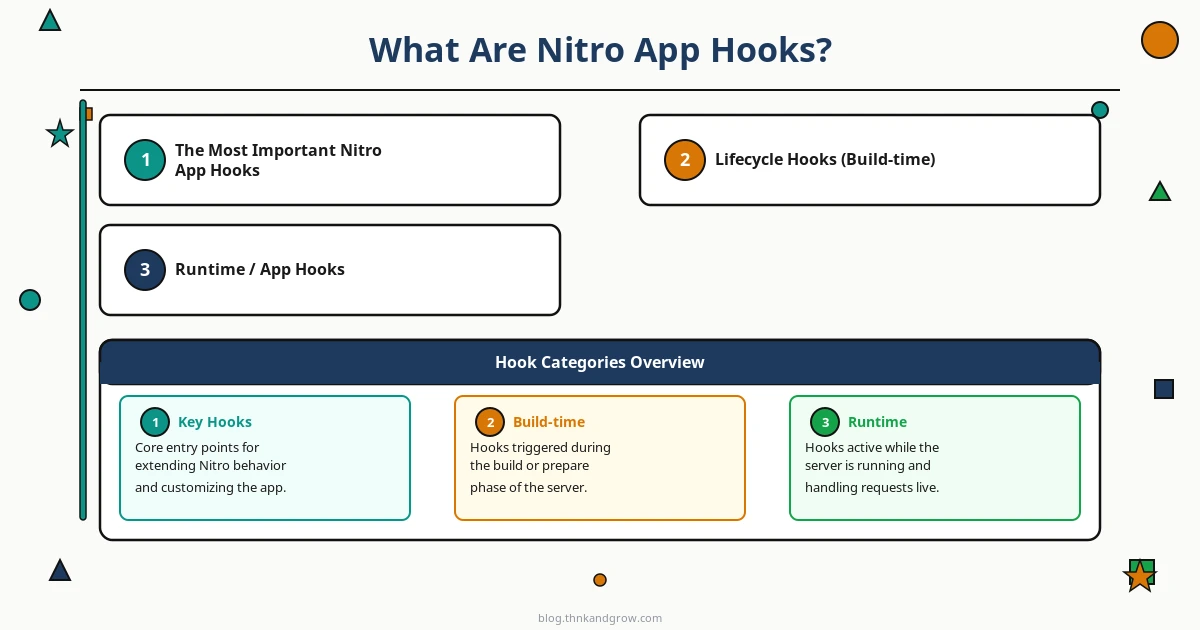
It’s important to distinguish between two categories of hooks in the Nitro/Nuxt ecosystem:
- Build-time hooks: These fire during the build process (e.g.,
nitro:init,nitro:build:before). They are registered innuxt.config.tsand allow you to modify Nitro’s configuration or behavior before the server bundle is compiled. - Runtime hooks (App hooks): These fire while the server is actively running and handling traffic. They are registered through Nitro plugins inside the
server/plugins/directory and represent the primary focus of this guide.
The core benefits of this architecture are significant. You get a plugin-based extensibility model that keeps your codebase modular, full TypeScript type safety with well-defined event and error object shapes, and true composability — you can combine multiple hooks across multiple plugins to build sophisticated server behaviors without coupling concerns together.
The Most Important Nitro App Hooks
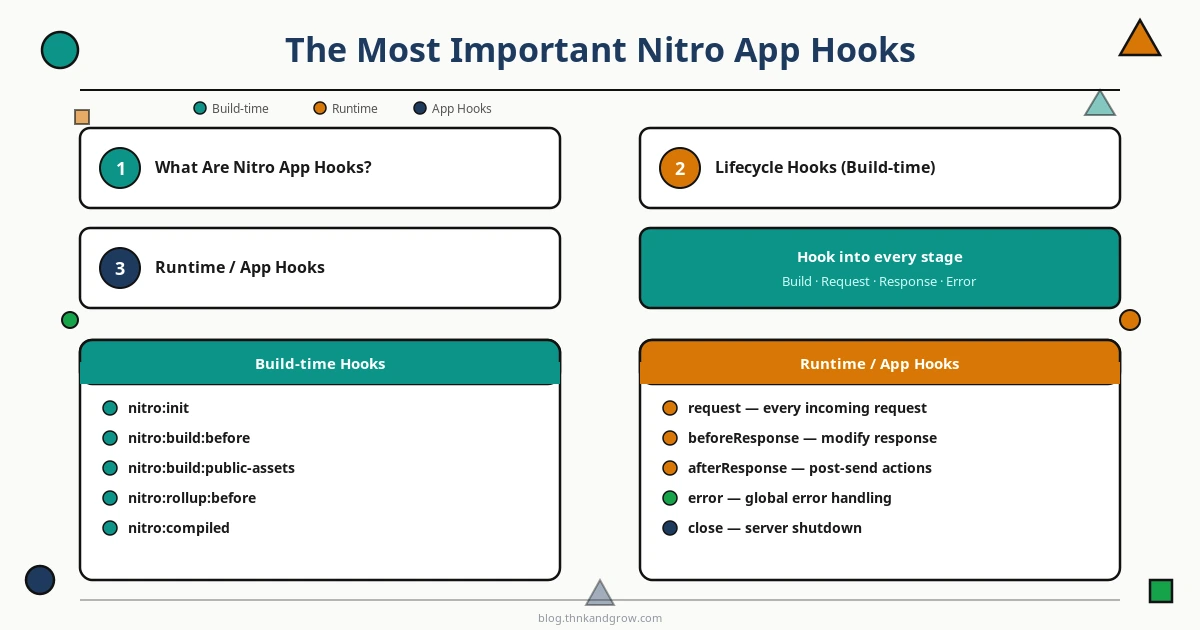
Nitro exposes a rich set of hooks across both the build and runtime phases. Here’s a structured overview of the ones you’ll use most frequently:
Lifecycle Hooks (Build-time)
nitro:init— Fires when the Nitro instance is initialized during build. Ideal for modifying the Nitro config programmatically.nitro:build:before— Fires before the build process starts. Useful for pre-build validations or injecting environment-specific settings.nitro:close— Fires when the Nitro instance is closed after build. Good for cleanup tasks in CI/CD pipelines.
Runtime / App Hooks
request— Fires on every incoming HTTP request. This is your primary hook for middleware-like logic such as authentication, rate limiting, and logging.beforeResponse— Fires just before the response is sent to the client. Use this to mutate response headers or body.afterResponse— Fires after the response has been sent. Ideal for non-blocking tasks like analytics tracking.error— Fires whenever an unhandled error occurs. Critical for centralized error reporting.close— Fires when the server is shutting down. Use this to gracefully close database connections or flush logs.
Render Hooks (SSR)
render:response— Fires when a server-rendered response is being assembled. Allows you to inspect or modify the full response object.render:html— Fires when the HTML output of an SSR render is ready. Useful for injecting custom scripts, meta tags, or modifying the HTML structure.
How to Register and Use Hooks in NuxtJS
There are two primary methods for registering hooks, and choosing the right one depends on whether you’re working at build time or runtime.
Method 1: Nitro Plugin (Recommended for Runtime Hooks)
For runtime hooks, the recommended approach is to create a plugin file inside the server/plugins/ directory. NuxtJS automatically discovers and registers any files placed here. The naming convention is straightforward — use a descriptive, lowercase filename like logger.ts or errorHandler.ts.
// server/plugins/logger.ts
export default defineNitroPlugin((nitroApp) => {
  nitroApp.hooks.hook('request', (event) => {
    console.log(`[${new Date().toISOString()}] ${event.method} ${event.path}`)
  })

  nitroApp.hooks.hook('close', () => {
    console.log('Server is shutting down...')
  })
})
The defineNitroPlugin helper provides full TypeScript inference for the nitroApp parameter, making it easy to explore available hooks and their payloads directly in your editor.
Method 2: nuxt.config.ts (For Build-time Hooks)
Build-time hooks are declared directly in your nuxt.config.ts file under the hooks property. This is the appropriate place for hooks that need to interact with the Nitro configuration object during the build phase.
// nuxt.config.ts
export default defineNuxtConfig({
  hooks: {
    'nitro:init': (nitro) => {
      console.log('Nitro initialized with config:', nitro.options.preset)
    },
    'nitro:build:before': (nitro) => {
      // Modify nitro options before build
      nitro.options.timing = true
    }
  }
})
Pro tip: Keep build-time hooks in
nuxt.config.tsand runtime hooks inserver/plugins/. Mixing them leads to confusing code and potential issues with hot module replacement during development.
Real-World Use Cases
Understanding the API is one thing — seeing it applied to real problems is where the value truly becomes apparent. Here are the most impactful use cases you’ll encounter in production applications.
Logging and Performance Monitoring
One of the first things any production server needs is observability. With the request hook, you can instrument every incoming request with minimal overhead:
// server/plugins/logger.ts
export default defineNitroPlugin((nitroApp) => {
  nitroApp.hooks.hook('request', (event) => {
    const start = Date.now()

    event.node.res.on('finish', () => {
      const duration = Date.now() - start
      console.log(`${event.method} ${event.path} — ${event.node.res.statusCode} [${duration}ms]`)
    })
  })
})
This pattern captures both the request metadata and the actual response time, giving you the data you need for performance dashboards without relying on external APM agents at the infrastructure level.
Centralized Error Handling
Instead of scattering try/catch blocks across your API routes, the error hook provides a single place to capture, format, and forward all server errors to your monitoring platform of choice:
// server/plugins/errorHandler.ts
export default defineNitroPlugin((nitroApp) => {
  nitroApp.hooks.hook('error', (error, { event }) => {
    // Forward to Sentry, Datadog, or any observability platform
    console.error({
      timestamp: new Date().toISOString(),
      url: event?.path,
      method: event?.method,
      message: error.message,
      stack: error.stack
    })
  })
})
Authentication Middleware
For applications with protected API routes, the request hook acts as a natural gateway for JWT validation or session checking:
// server/plugins/auth.ts
export default defineNitroPlugin((nitroApp) => {
  nitroApp.hooks.hook('request', async (event) => {
    if (event.path.startsWith('/api/protected')) {
      const authHeader = getHeader(event, 'Authorization')
      if (!authHeader?.startsWith('Bearer ')) {
        throw createError({ statusCode: 401, statusMessage: 'Unauthorized' })
      }
      // Validate token logic here
    }
  })
})
Database Connection Management
Managing database connections at the server level — rather than per-request — is a critical performance pattern. Nitro hooks make this clean and reliable:
// server/plugins/database.ts
export default defineNitroPlugin(async (nitroApp) => {
  const db = await connectToDatabase(process.env.DATABASE_URL!)
  console.log('Database connected successfully')

  nitroApp.hooks.hook('close', async () => {
    await db.disconnect()
    console.log('Database connection closed gracefully')
  })
})
Response Transformation
The beforeResponse hook is ideal for adding security headers, CORS policies, or custom metadata to every outgoing response — keeping this logic centralized rather than duplicated across route handlers:
// server/plugins/responseHeaders.ts
export default defineNitroPlugin((nitroApp) => {
  nitroApp.hooks.hook('beforeResponse', (event, { body }) => {
    setResponseHeader(event, 'X-Powered-By', 'MyApp/1.0')
    setResponseHeader(event, 'X-Content-Type-Options', 'nosniff')
  })
})
Best Practices When Working with Nitro Hooks
As with any powerful tool, discipline in how you use Nitro hooks makes the difference between a maintainable codebase and a tangled mess of side effects.
- Single Responsibility per Plugin: Each plugin file should do exactly one thing. A
logger.tshandles logging, anauth.tshandles authentication. This makes debugging, testing, and replacing individual behaviors straightforward. - Always handle async correctly: Nitro supports async hook handlers, but unhandled promise rejections can silently swallow errors. Always use
try/catchinside async hooks or ensure your error surfaces through theerrorhook. - Leverage TypeScript fully: The
event,error, andnitroAppobjects all have well-defined types. Use them. Your IDE will thank you, and you’ll catch type mismatches at compile time rather than in production. - Keep the
requesthook lean: This hook fires on every single request. Heavy synchronous computations or blocking I/O here will directly degrade your server’s throughput. Defer non-critical work toafterResponsewhere possible. - Use the
closehook for cleanup: Never rely on process exit signals alone for resource cleanup. Theclosehook is the proper, framework-aware way to release database connections, flush log buffers, or cancel scheduled tasks.
Nitro Hooks and the UnJS Ecosystem
Nitro doesn’t exist in isolation — it’s part of a broader ecosystem of composable, framework-agnostic libraries under the UnJS umbrella. Understanding these relationships helps you build more effectively and debug more confidently.
At the HTTP layer, Nitro uses H3 as its request/response framework. When you access event inside a hook, you’re working with an H3 H3Event object. Utilities like getHeader, setResponseHeader, and createError all come from H3. The hooks system itself is powered by hookable, which provides the underlying pub/sub mechanism. This means if you ever need to create your own hookable systems in your application, you can use the same library.
One of Nitro’s most compelling strengths is its universal deployment model. The same hook code you write for your local Node.js development server will work identically on Vercel Edge, Cloudflare Workers, or AWS Lambda — because Nitro abstracts away the platform-specific runtime details. This is a significant architectural advantage for teams that need deployment flexibility.
In Nitro v2.x, several exciting capabilities have been added. Native WebSocket support via hooks enables real-time features without additional middleware layers. Task scheduling (currently experimental) allows you to define cron-like background jobs within the Nitro runtime. And deeper integration with SQL databases through the unstorage and database connector APIs is making Nitro increasingly capable as a full backend runtime, not just an SSR middleware layer.
As edge computing continues to mature, Nitro’s architecture positions NuxtJS 3 applications to take full advantage of globally distributed runtimes. Hooks that run at the edge — with sub-millisecond cold starts and geographic proximity to users — represent the direction the entire ecosystem is moving.
Conclusion
Nitro App Hooks represent one of the most elegant and underutilized features in the NuxtJS 3 ecosystem. They give you structured, type-safe, and composable control over every meaningful moment in your server’s lifecycle — from the first request to graceful shutdown — without requiring you to fork the framework or fight against its abstractions. By registering runtime hooks through Nitro plugins and build-time hooks through nuxt.config.ts, you can layer sophisticated behaviors like centralized logging, global error reporting, authentication gating, and database lifecycle management cleanly onto your application.
If you’re just getting started with Nitro hooks, the best path forward is incremental. Begin with a simple request logger to understand how event objects flow through the system. Then add a centralized error handler to gain visibility into what’s failing in production. Once those feel comfortable, you’ll have the mental model needed to tackle more advanced patterns like authentication middleware, response transformation, and graceful resource management.
The investment in learning Nitro’s hooks system pays dividends that compound over time — your server-side code becomes more modular, your team can reason about behaviors in isolation, and your application becomes genuinely portable across deployment targets. That’s the kind of architectural foundation worth building on.